GG修改器破解版下载地址:https://ghb2023zs.bj.bcebos.com/gg/xgq/ggxgq?GGXGQ
大家好,今天小编为大家分享关于gg修改器不用root框架_gg修改器免root框架下载及其使用的内容,赶快来一起来看看吧。
在本文,我将介绍几种不用 Docker 就可以构建容器的方法。我将以 OpenFaaS 作为参考案例,它的工作负载使用了 OCI 格式的容器镜像。OpenFaaS 是 Kubernetes 的一个 CaaS 平台,可以运行微服务和添加 FaaS 及事件驱动工具。
第一个示例将展示如何使用 Docker CLI 内置的 buildkit 选项,然后是单独使用buildkit,最后是谷歌的容器构建器Kaniko。
本文涉及的工具都是基于 Dockerfile 文件来构建镜像的,因此,任何限制用户只能使用 Java (jib)或 Go (ko)的工具都不在讨论范围之内。
Docker 在 armhf、arm64 和x86_64平台上运行良好。Docker CLI 不仅用于构建/发布/运行镜像,多年来它还背负了太多的东西,现在还与 Docker Swarm 和 Docker EE 特性捆绑在一起。
有一些项目试图让“docker”回到它原本的组件身份,也就是我们最初都喜爱的用户体验:
在所有的选项中,我最喜欢 k3c,但它使用起来比较繁琐,它把所有东西都捆绑在一个二进制文件中,这很可能会与其他软件发生冲突。它运行的是自己的嵌入式 containerd 和 buildkit 二进制文件。
由于我们关注的是“构建”部分以及相对稳定的选项,所以我们将着重看一下:
由于 OpenFaaS CLI 可以输出任意构建器都可以使用的标准“构建上下文”,所以上述的所有东西都可以实现。
让我们从一个 Golang HTTP 中间件开始,并借此来展示 OpenFaaS 的通用性。
我们将获得以下这些内容:
./

├── build-test

│   └── handler.go

└── build-test.yml
1 directory, 2 files
处理程序修改起来很容易,还可以通过 vendoring 或 Go 模块来添加其他依赖项。
package function
import (
"fmt"
"io/ioutil"
"net/http"
)
func Handle(w http.ResponseWriter, r *http.Request) {
var input []byte
if r.Body != nil {
defer r.Body.Close()
body, _ := ioutil.ReadAll(r.Body)
input = body
}
w.WriteHeader(http.StatusOK)
w.Write([]byte(fmt.Sprintf("Hello world, input was: %s", string(input))))
}
构建这个应用程序的一般方式是这样的:
faas-cli build -f build-test.yml
./template/golang-middleware/Dockerfile中包含了模板和 Dockerfile 的本地缓存。
这次构建拉取了三个镜像:
FROM openfaas/of-watchdog:0.7.3 as watchdog

FROM golang:1.13-alpine3.11 as build

FROM alpine:3.12
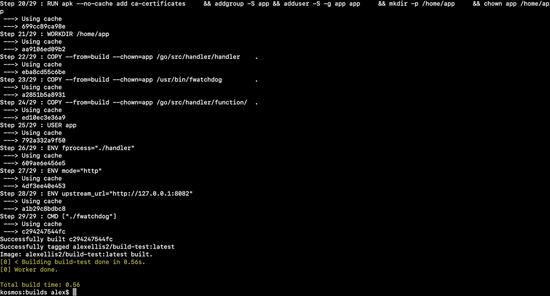
如果使用传统的构建器,将按顺序拉取每个镜像。
等一会儿构建就完成了,现在本地库中就有了构建的镜像。
我们还可以使用 faas-cli push -f build-test.yml将镜像推到注册表中。
这是最简单的做法,构建起来也很快。
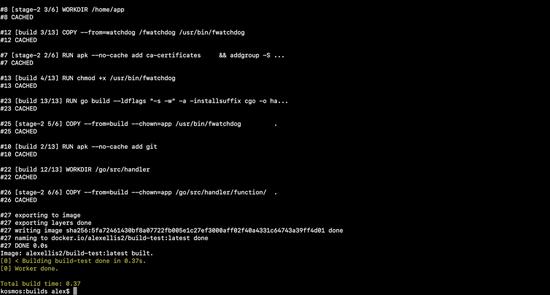
DOCKER_BUILDKIT=1 faas-cli build -f build-test.yml
我们可以看到,Docker 守护进程会自动切换到 buildkit 构建器。
Buildkit 有很多优点:
有了 buildkit,所有的基础镜像都可以一次性被拉取到本地库中,因为 FROM(下载)命令不是按顺序执行的。
FROM openfaas/of-watchdog:0.7.3 as watchdog

FROM golang:1.13-alpine3.11 as build

FROM alpine:3.11
这个在 Mac 上也可以使用,因为 buildkit 是由运行在 VM 中 Docker 守护进程负责代理的。
要单独使用 buildkit 进行镜像构建,我们需要在 Linux 主机上单独运行 buildkit,因此不能使用 Mac。
faas-cli build通常会运行或分叉出 docker,因为这个命令实际上只是一个包装器。因此,为了绕过这种行为,我们需要创建一个构建上下文,类似下面这样:
faas-cli build -f build-test.yml --shrinkwrap
[0] > Building build-test.
Clearing temporary build folder: ./build/build-test/
Preparing ./build-test/ ./build/build-test//function
Building: alexellis2/build-test:latest with golang-middleware template. Please wait..
build-test shrink-wrapped to ./build/build-test/
[0] < Building build-test done in 0.00s.
[0] Worker done.
Total build time: 0.00
这个上下文可以在./build/build-test/文件夹中找到,其中包含了函数代码和模板及其入口点和 Dockerfile。
./build/build-test/

├── Dockerfile

├── function

│   └── handler.go

├── go.mod

├── main.go

└── template.yml
1 directory, 5 files
现在我们需要运行 buildkit,可以从源代码开始构建,或者从上游获取二进制文件。
curl -sSLf https:///moby/buildkit/releases/download/v0.6.3/buildkit-v0.6.3.linux-amd64.tar.gz | sudo tar -xz -C /usr/local/bin/ --ponents=1
如果你仔细看一下发布页,你会发现 buildkit 也支持 armhf 和 arm64。
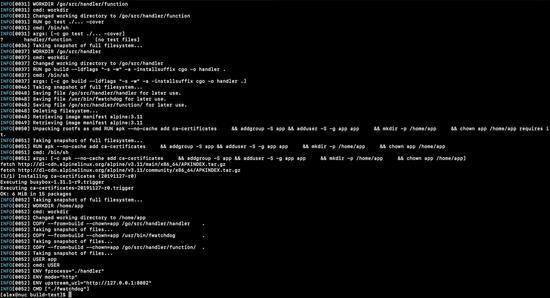
在新窗口中运行 buildkit 守护进程:
sudo buildkitd

WARN[0000] using host network as the default

INFO[0000] found worker "l1ltft74h0ek1718gitwghjxy", labels=map[org.mobyproject.buildkit.worker.executor:oci org.mobyproject.buildkit.worker.hostname:nuc org.mobyproject.buildkit.worker.snapshotter:overlayfs], platforms=[linux/amd64 linux/386]

WARN[0000] skipping containerd worker, as "/run/containerd/containerd.sock" does not exist

INFO[0000] found 1 workers, default="l1ltft74h0ek1718gitwghjxy"

WARN[0000] currently, only the default worker can be used.

INFO[0000] running server on /run/buildkit/buildkitd.sock
现在我们开始构建,并将配置文件的位置作为构建上下文传给它。我们需要 buildctl 命令,buildctl 是守护进程的一个客户端,它将指定如何构建镜像以及在构建完成后应该做什么,比如导成 tar、忽略构建或将其推送到注册表。
buildctl build --help

NAME:

   buildctl build - build
USAGE:
To build and push an image using Dockerfile:
$ buildctl build --frontend dockerfile.v0 --opt target=foo --opt build-arg:foo=bar --local context=. --local dockerfile=. --output type=image,name=docker.io/username/image,push=true
OPTIONS:
--output value, -o value Define exports for build result, e.g. --output type=image,name=docker.io/username/image,push=true
--progress value Set type of progress (auto, plain, tty). Use plain to show container output (default: "auto")
--trace value Path to trace file. Defaults to no tracing.
--local value Allow build access to the local directory
--frontend value Define frontend used for build
--opt value Define custom options for frontend, e.g. --opt target=foo --opt build-arg:foo=bar
--no-cache Disable cache for all the vertices
--export-cache value Export build cache, e.g. --export-cache type=registry,ref=/foo/bar, or --export-cache type=local,dest=path/to/dir
--import-cache value Import build cache, e.g. --import-cache type=registry,ref=/foo/bar, or --import-cache type=local,src=path/to/dir
--secret value Secret value exposed to the build. Format id=secretname,src=filepath
--allow value Allow extra privileged entitlement, e.g. network.host, security.insecure
--ssh value Allow forwarding SSH agent to the builder. Format default|<id>[=<socket>|<key>[,<key>]]
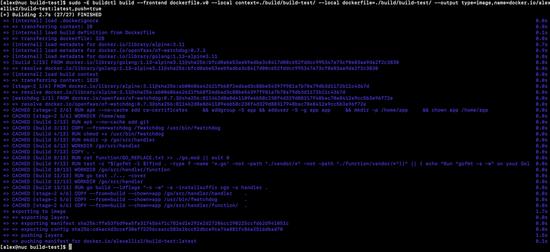
我使用下面的命令获得与 Docker 命令等价的效果:
sudo -E buildctl build --frontend dockerfile.v0

 --local context=./build/build-test/

 --local dockerfile=./build/build-test/

 --output type=image,name=docker.io/alexellis2/build-test:latest,push=true
在运行这个命令之前,你需要先运行 docker login,或者使用一组有效的未加密凭证来创建 $HOME/.docker/config.json 文件。
由于我从未使用过 img,也没有听说有团队在大规模使用它,所以我想要尝试一下。
首先它不支持多平台架构,armhf 和 ARM64 平台没有对应的二进制文件,而且项目年龄不算短了,所以不太可能会提供多平台支持。
x86_64平台的最新版本是 2019 年 5 月 7 号的 v0.5.7,使用 Go 1.11 构建:
sudo curl -fSL "https:///genuinetools/img/releases/download/v0.5.7/img-linux-amd64" -o "/usr/local/bin/img"

	&& sudo chmod a+x "/usr/local/bin/img"
它的构建选项就像是 buildctl 的一个子集
img build --help

Usage: img build [OPTIONS] PATH
Build an image from a Dockerfile.
Flags:
-b, --backend backend for snapshots ([auto native overlayfs]) (default: auto)
--build-arg Set build-time variables (default: [])
-d, --debug enable debug logging (default: false)
-f, --file Name of the Dockerfile (Default is ’PATH/Dockerfile’) (default: <none>)
--label Set metadata for an image (default: [])
--no-cache Do not use cache when building the image (default: false)
--no-console Use non-console progress UI (default: false)
--platform Set platforms for which the image should be built (default: [])
-s, --state directory to hold the global state (default: /home/alex/.local/share/img)
-t, --tag Name and optionally a tag in the ’name:tag’ format (default: [])
--target Set the target build stage to build (default: <none>)
要构建一个镜像需要做这些事情:
sudo img build -f ./build/build-test/Dockerfile -t alexellis2/build-test:latest ./build/build-test/
由于这样或那样的原因,img 实际上没能构建成功。可能是因为试图以非 root 用户身份进行一些优化。
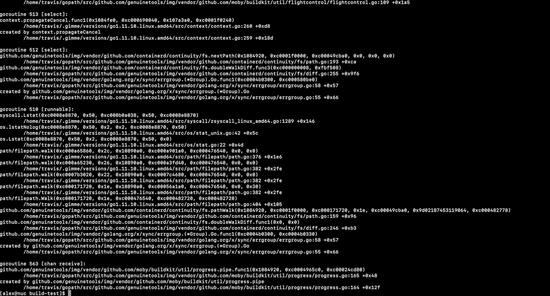
fatal error: unexpected signal during runtime execution

[signal SIGSEGV: segmentation violation code=0x1 addr=0xe5 pc=0x7f84d067c420]
runtime stack:
runtime.throw(0xfa127f, 0x2a)
/home/travis/.gimme/versions/go1.11.10.linux.amd64/src/runtime/panic.go:608 +0x72
runtime.sigpanic()
/home/travis/.gimme/versions/go1.11.10.linux.amd64/src/runtime/signal_unix.go:374 +0x2f2
goroutine 529 [syscall]:
runtime.cgocall(0xc9d980, 0xc00072d7d8, 0x29)
/home/travis/.gimme/versions/go1.11.10.linux.amd64/src/runtime/cgocall.go:128 +0x5e fp=0xc00072d7a0 sp=0xc00072d768 pc=0x4039ee
os/user._Cfunc_mygetgrgid_r(0x2a, 0xc000232260, 0x7f84a40008c0, 0x400, 0xc0004ba198, 0xc000000000)
似乎已经存在三个类似的问题。
Kaniko 是谷歌的容器构建器,旨在为容器构建提供沙箱。你可以将其作为一次性容器,也可以将其作为独立的二进制文件。
docker run -v $PWD/build/build-test:/workspace

 -v ~/.docker/config.json:/kaniko/config.json

 --env DOCKER_CONFIG=/kaniko

 gcr.io/kaniko-project/executor:latest

 -d alexellis2/build-test:latest
Kaniko 提供了缓存支持,但需要手动管理和保存,因为 Kaniko 是在一次性模式下运行的,不像 Buildkit 那样是守护进程。
安装 Docker 是个“大工程”,可能会给你的系统带来比预想的要多得多的东西。Docker 构建器是最古老的,也是最慢的。要注意在安装 Docker 时附带安装的网桥,它可能会与使用相同私有 IP 段的其他私有网络发生冲突。
这是最快的工具选择,改动最少,只需要加个DOCKER_BUILDKIT=1就可以启用。
这个选项非常适合集群内构建,或者不需要 Docker 的系统(如 CI 或执行器)。它需要 Linux 主机,在 MacOS 上的使用体验太差,或许可以运行一个额外的 VM 或主机,然后通过 TCP 来访问?
使用 Kaniko 仍然需要安装 Docker,但不管怎样,它毕竟提供了另一种选择。
你可以在 OpenFaaS 中使用普通的容器构建器,也可以使用 faas-cli build –shrinkwrap,并将构建上下文传给首选工具。
下面是使用相应工具构建 OpenFaaS 容器的示例:
在 OpenFaaS 云上,我们使用本文介绍的上下文传递方法和 buildkit 守护进程提供了完全不需要人工干预的 CI/CD 构建体验。对于其他用户,我建议使用 Docker,或者带有 buildkit 的 Docker。
你可以使用 GitHub 或 GitLab 集成构建自托管的 OpenFaaS 云环境。
对于 faasd 用户,你的主机上只安装了 containerd,而没有安装 docker,所以最好的选择是下载 buildkit。
原文链接:
https://blog.alexellis.io/building-containers-without-docker/
延伸阅读:
关注我并转发此篇文章,私信我“领取资料”,即可免费获得InfoQ价值4999元迷你书,点击文末「了解更多」,即可移步InfoQ官网,获取最新资讯~
以上就是关于gg修改器不用root框架_gg修改器免root框架下载及其使用的全部内容,感谢大家的浏览观看,如果你喜欢本站的文章可以CTRL+D收藏哦。
怎样打开gg修改器root权限,如何打开GG修改器Root权限 大小:7.60MB9,837人安装 在大家玩游戏的过程中,相信不少人都会碰到一些难以通过的关卡或者道具,这时候使用……
下载
最新版GG修改器教程,最新版GG修改器教程:让游戏更加精彩 大小:18.47MB9,536人安装 最新版GG修改器,相信大家都不会陌生,它是一款常用的游戏修改器,不仅可以实现游戏……
下载
gg游戏修改器怎么调英雄, gg游戏修改器:如何使用修改器调整英雄? 大小:6.65MB9,873人安装 如果你是一名狂热的游戏爱好者,那么你一定梦想着成为游戏中的英雄,展现你所掌握的……
下载
gg修改器免root版64位,gg修改器免root版64位:改变游戏乐趣,轻松畅玩 大小:12.73MB9,832人安装 对于众多喜爱玩游戏的玩家来说,游戏体验是否流畅、操作是否简便、游戏乐趣是否充分……
下载
gg修改器 中文版,GG修改器中文版让游戏更加刺激 大小:16.59MB9,271人安装 作为一名游戏爱好者,我相信大家对游戏平衡性和游戏操作性都非常看重。然而,很多游……
下载
gg修改器怎么加root,GG修改器如何加Root? 大小:7.66MB9,694人安装 GG修改器是一款非常实用的辅助工具。如果您想玩一些修改游戏,那么GG修改器绝对是您……
下载
gg修改器的root权_gg修改器 root权限 大小:17.64MB10,752人安装 大家好,今天小编为大家分享关于gg修改器的root权_gg修改器 root权限的内容,赶快来……
下载
gg修改器免root版球球,让球球更好玩gg修改器免root版球球 大小:19.36MB9,774人安装 手机游戏的兴起让我们可以在闲暇时刻享受不同类型的游戏,其中以球球游戏最为受欢迎……
下载
gg修改器免费root怎么用,GG修改器免费root是如何成为我最爱的手机工具的 大小:16.84MB10,087人安装 作为一名重度玩家,我不断寻找能够节省时间并提升游戏体验的工具。不久前,我发现了……
下载
gg修改器 免root西西_gg修改器免root教程 大小:15.27MB10,846人安装 大家好,今天小编为大家分享关于gg修改器 免root西西_gg修改器免root教程的内容,赶……
下载